Stock Wedding Photo Booth

Everything You Need to Know About Renting a Photo Booth for a Wedding

A photo booth is a unit that is specifically designed to allow one to take a few pictures in quick succession for entertainment purposes. While they are widely seen in carnivals and fairs, they are also used in weddings to not only provide fun but also to create very memorable moments.

Everything you need to know about renting a photo booth for a wedding

Before you visit a vendor and discuss different types of wedding photo booths, their features and prices, there are a few things you need to decide. This will allow you to ask the right questions and make a better-informed decision later on.

  • Size – Although a photo booth is technically a compact unit, there is no rule that you should always keep it that way. Sometimes it’s more fun to go in with five to six people and take some fun photographs. A wedding represents a singular moment in which people come together and celebrate the union of two individuals. People want to experience the moment together and so a larger photo booth will always be more convenient and fun for the guests.
  • Booth management – Some companies offer booths with someone to manage them whereas others let the renter take care of it. So if you can’t find someone to manage it during the wedding, only look for companies that provide help.
  • Price – You should check out different booths offered by different companies to get an idea of how much they cost. Once you have a rough figure, you can tweak it as per your wedding budget to make it bigger or smaller as required. Try to have a firm idea of how much you are willing to spend and stick to it as long as it is reasonable as per the average cost.
  • Quality of pictures – This is one of the most important aspects to keep in mind before you approach any vendors. Some companies may have amazing photo booths but use bad quality printers which defeats the entire purpose of having a booth at your wedding. So before you visit any vendors, always ask for photo samples. If the samples look good, you can go ahead with them. Otherwise, keep looking for other vendors.
  • Photo options – To get more value for your money, always look for companies that offer both digital and physical options. Different people have different tastes and some still prefer to have physical photographs rather than digital ones. They can be framed and displayed openly whereas digital copies often get forgotten over time.

What to ask before renting

Renting a photo booth for a party is a big expense, so make sure you’re working with a reputable company that will deliver a high-quality product. Before paying your deposit, take these steps to ensure a good time is had by all.

  • Read reviews. You’ll learn about what your experience will be like based on past user experience. Avoid anyone who has a sub-par product, has unfriendly staff, or doesn’t follow through on their contracts.
  • Look for licenses and insurance. Confirm that the companies you’re considering have pertinent business licenses and liability insurance. This will protect you and your guests in case of an accident. For more, check out our tips for smart hiring.
  • Find the right financial fit. If the price seems too good to be true, it probably is. Quality equipment is an investment, so anyone with lowball prices may be operating a photo booth that isn’t as fancy as you might desire.
  • Look for the features you love. If you just want a classic photo booth that prints out black-and-white strips, keep it simple. If you want a high-tech photo booth with all the bells and whistles, you can have that, too. Just keep in mind that, usually, the more features offered, the more the rental will cost.
  • Sign a contract. You don’t want your dream wedding photo booth not to show and leave you with no recourse. Get it all in writing, including hours and cost.
  • Have an attendant. Even self-operating photo booths run best with an informed technician on hand to troubleshoot any problems and keep things running smoothly. Most operations offer this service.
  • Are prints included? Find out whether your rate includes prints, and whether that’s a finite or unlimited number of prints.

How to choose a wedding photo booth?

There are a few key aspects you need to look for when it comes to choosing a photo booth for your wedding. Here are some of them:

  • Rent or DIY – You can either rent a booth from a service or make one on your own. If you rent one, it will cost you more money and won’t come with a great deal of customization but it will be more reliable. Most services will also help you out if you face any issues with the product. If you choose to make one for the wedding, you will be able to save a lot of money and customize it to dazzle your guests. However, if any issue comes up, you might have problems resolving it in time.
  • Types – Photo booths come in many different types and shapes such as boxes, tents, pipes with drapes and even pods. When it comes to choosing one for your wedding, don’t go for one based purely on its appearance. Convenience is what you need to look for because it’s more for the guests and you want them to have the best time possible. The location you plan to put the booth should also be factored in when you choose the type of photo booth you want to go for.
  • Features – Whether it is rented or a created one, features and functionality are what will make a photo booth experience memorable. Rented ones especially come with unique functions as their respective companies need to make their product stand out from each other. From props, green screen, video to even scrapbooking, there are a ton of unique features to look for before renting or creating one. Some come with pop up powder rooms where you can spend some time to put on some fun makeup or make sure you look good before taking pictures.
  • Value – A photo booth for a wedding is going to be useful only for a single day. A wedding is expensive even without any frills or special activities. So you need to make sure that the booth you are planning to get gives you enough value to justify its price. Some companies offer package deals whereas others will up-sell some of their services. The only thing you have to ensure is that when you rent a photo booth, it should come with digital photos included. If the photos are going to cost extra, then it’s not going to offer you a lot of value for the money being spent.

Cost-saving strategies

  • Book your photo booth on weekdays or off-seasons for the best rates.
  • Bundle photo booth and photography services with the same company.
  • A party with fewer than 100 guests will usually be satisfied with two or three hours of photo booth time. Ask to extend hours during the event if needed rather than overbooking ahead of time, unless it’s high season and the company may have two events in one day.
  • Schools, nonprofits, military organizations and other groups are often eligible for discounts.

3 Good Reasons To Rent A Photobooth For Your Birthday

You want to organize your birthday or that of a friend and you are looking for inspiration for events that will certainly be successful? Are you panicking in advance at the thought of an evening too quiet where guests sit gently in their chairs and look into the whites of their eyes. 3 reasons to rent a photo kiosk for a great event right away!

1. With the rental of photobooth, it’s the big atmosphere guaranteed!

We all remember an evening a little too wise, guests waiting impatiently for the cake to arrive so they can slip away, a few balloons swollen in a hurry and a slightly wobbly « Happy Birthday » sign on a wall. The good will of the few motivated people present that evening was not enough to set the atmosphere in motion, despite a desperate attempt to set the dancefloor on fire on « Les Lacs du Connemara » at around 10:25 pm. People inevitably stuck to their seats, lethargic and depressed, mobile phone in hand, trying to hide the first yawning.

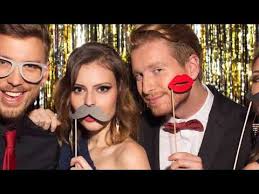
Renting a photobooth for your birthday is the guarantee of a memorable and completely crazy evening. Everyone likes to have their picture taken in these festive moments, everyone is dressed up, the beautiful dresses turn heads and the bow ties are out. It is often an opportunity to see people we may not have seen in a few months or years, with the desire to have their pictures taken together. A photobooth animation is also a whole bunch of fun accessories at hand: big glasses, straw hats, bushy beard, wigs… With this, the atmosphere is guaranteed until late at night (or early in the morning for the most daring)

2. Your guests leave with memorable memories

Smartphones are great. The latest ones offer sumptuous photos, it is possible to take as many as you want and you can share them in a second on social networks. The latter are not to be outdone, with new filters every day that make us beautiful, with blue eyes and smooth skin or cute little ears. The other side of the coin is that you spend a good part of your birthday party on your phone, posting your photos on Instagram, following the stories of your contacts on Snapchat (« They look like they’re having fun at this party! ») or responding to comments on your latest Facebook post.

Renting a photobooth will allow you to really enjoy the evening, with your friends or family, here and now! No need for someone to take the picture, the terminal does it for you. Gather your friends, put on a beautiful afro wig and come and pose in front of the lens of the photo box. Different formats are available to vary the pleasures: landscape photo, portrait, bookmark… Switch from one frame to another and print your photos in 10 seconds, in professional quality thanks to the integrated printer. And why not put a nice guestbook on a table near your photobooth? Your guests will be able to stick a few photos on it and leave you a loving little birthday note!

3. Pictures in the colours of your birthday

Printing your photos on paper is good! But being able to personalize your photos with the colours of your event is even better. Imagine: you decide to rent a photo kiosk to spend a crazy birthday party. You then think of a theme that will perfectly match the evening, and this year it will be an exotic evening. You go and buy all the necessary decoration: tablecloths, plates, paper napkins, balloons… You decorate your room with little onions and you plan a corner specially equipped for your photobooth. But here we are, the photos come out classic, frameless and tasteless. Too bad!

By renting a Burddy photobooth for your birthday, you will enjoy the free customization of your frames to stay as close as possible to your theme! Choose and create up to 16 different frames, vary formats, texts and colours and switch from one to the other during the evening. Our online tool will provide you with many examples of backgrounds and different writing styles, so you can let your imagination run wild. And for even more customization, the blank frames can be downloaded in PNG or PSD format for the delight of Photoshop and other image editing software enthusiasts.

Use The Best Loading Services

How Much Does a Removal Company Cost?

Example of Average House Removal Costs

The table below provides a full breakdown of the average house removal costs for a 3-bedroom property moving 50 miles away. It includes the removal company cost, cost of packing boxes and a dismantling and reassembling furniture service.

Average Removal Cost Based on Size of Property

Below are the average removal costs for different sized properties that are travelling 50 miles and 150 miles. The cost of a removal company will vary depending on the company you use, the distance travelled and any additional services you need.

Pre-move Survey

Once you’ve received your removal quotes from Compare My Move’s verified removal partners, they should offer you a free pre-move survey at your home. This will allow them to confirm the quotation, discuss any special requirement you have and check the access and parking arrangements for their vehicle.

How are Removal Costs Based on Distance Travelled?

A removal company will charge less for relocating in the local area than they would do for moving across the country or overseas. The further distance you move, the more you will pay. A recent survey of our partner network showed that some removal companies charge at an hourly rate, while others break down costs on a mile by mile basis.

Most removal companies offer a part or full packing service to help you with the move. The service will include visiting your house before the move and professionally packing your belongings, loading on to the van and unloading at the new house.

Removal Service

What moving services do we offer

We want to ensure your move is as stress-free as possible, so our removal service can be adapted to your needs. Our packing service makes life a lot easier, but we also supply free packing materials if you do want to do the packing yourself. The movers can also take care of dismantling furniture. Storage is also available for as long as you need it, even if its just overnight. Our storage rates are very competitive. We are one of the few removal companies who offer free transit and storage insurance

Our storage rates compare very favourably with our competitors, partly due to our large storage capacity and having everything in the one place. We can operate efficiently with fewer warehouse staff and fork trucks by having just one facility. The overall cost of your removal is mainly based on the time it takes to pack, load and unpack your belongings. The fuel and travelling time costs are relatively low. Cost is an important factor when moving, but our customers also value, reliability, experience and the ability for us to adapt our service to their needs.

The reason for a family move is often a deeply personal and emotional one. Moving during a difficult family time can take an especially hard toll on your family. Throughout this guide, we consider your family every step of the way and provide advice on ways to help all prepare and cope with the upheaval.

Taking your time to plan your move week by week, hour by hour and box by box in advance is easier said than done. This is particularly challenging when you are trying to run a household as well as juggle work with your three and five year old. The way you approach your move will depend on the moving circumstances and the help or resources at hand. We give you practical tips to help you successfully organise and pack up your family life ready for the big day.

Using our experience and research we have gathered together some useful tips, advice, and things to consider for your family on moving day. Keeping some key pointers in mind for your moving day will help you support your family and tackle each hurdle as it comes

Clearance Guide

Clearance definition

clearance is generally defined as the loading and removal of bulky waste from a property by a man & van crew. The service covers collection of waste from anywhere on the property, loading it into a truck, sweeping up any loose material, and delivering the waste to a licensed disposal facility.  Rates are based on the volume of waste removed and cover the labour, transport and disposal fees.

Who provides clearance?

Every council is obliged to offer a subsidised collection service for bulky household items to its residents.  Some offer this for free, but most charge – and in recent years those charges have steadily risen.  The service is normally restricted to furniture, appliances and other household ‘junk’, rather than builders and home improvement waste. This is because the latter is considered ‘trade waste’ and not something the council should subsidize. Service levels tend to be pretty basic so you will often have to wait a week or so for an appointment and all items must be placed outside.  Nonetheless it is normally cheaper than a private service, so if you don’t mind the inconvenience, it’s definitely worth checking your local council’s website to see what they offer.

Private waste companies, although likely to cost more than the council, take the full range of bulky waste (rather than just household junk) and, unlike council crews, their teams will collect from anywhere on the property (including upstairs and the back garden).  Plus they will be available at much shorter notice and offer narrow arrival times, so you don’t need to wait around all day.  Prices of one man bands may be cheaper than larger, professional organisations

Waste types – what bulky waste types can be removed?

Bulky waste means in the context clearance any non-hazardous waste that can comfortably be lifted by two people.  This includes builders waste, fly-tipped waste, bulky appliances (including domestic fridges), furniture, bric-a-brac, carpet, plasterboard, garden waste and household junk.  For waste licensing, health & safety and insurance reasons, most firms will not remove the following hazardous items:

Asbestos (read our guide on safe disposal of asbestos)

Batteries

Clinical or medical waste, including syringes

Fluorescent tubes

Commercial fridges, freezers and air conditioning units

Gas canisters and gas bottles

Hazardous & toxic materials

Oil, petrol, diesel

Paint & Cans of paint

Tyres

Weight restrictions – do I need to worry about how heavy the waste is?

clearance firms typically don’t like and aren’t best suited to jobs with lots of very heavy demolition or excavation waste like soil, rubble and cement (often referred to as ‘inert waste’).  This is because their collection vehicles are usually light goods vehicles.  Light goods vehicles, although cheaper and easier to run than heavy goods vehicles, must by law never weigh more than 3.5 tonnes.

Removals Training from the Experts

House Removals

Whether you are moving across town or to a different city or continent, finding a reliable removal company will be essential to ensure your house move runs smoothly.

vast experience of the entire removals process makes us the best choice when deciding on a home moving provider. We fully understand that no two moves are the same. That’s why our fully personalised approach to removals has made us one of the most popular choices for moving home.

National Home Movers

Whether you need to insure your expensive items during the packing process or need additional cover for international removals

Why Choose?

If you’re heading from a city apartment to a suburban house, or from the quiet countryside to the centre of a metropolitan city, has the experience and expertise to provide you with exceptional service when moving home

There’s no obligation to proceed yet you’ll quickly discover that our removals company service is offered at a highly competitive price.

Frequently Asked Questions

What is a Bill of Lading or BOL?

A Bill of Lading is a contract between you and for the transportation of your household goods. It will include your name, origin and destination address, equipment information, and other information important to your move. We will mail, email or fax a copy of your BOL before your move, so you’ll have the opportunity to review the details and terms and make sure everything is correct. If you have questions or need to make changes before moving day, just give us a call.

You Pack.

Take control of your move from the start by packing exactly how you want! No waiting for a crew, and no wasting time packing items you don’t need. The best part? The ability to pack your own things can help you save money! The less space you use, the more you save. 

You Load.

Place your items in the moving equipment and secure them for transit. You get up to three business days, so no need to rush. Need help with this part? We’ve got you covered

We Drive.

Let us know when you’re finished loading, and we’ll come get the equipment. No need to stick around — you won’t need to sign at pick-up. You’re free to start traveling to your new home. Stop when you like and get a good night’s sleep. Your belongings are in good hands.

What is the best way to pack and load?

Use quality packing supplies and these  packing tips,  loading tips and  moving videos to help make sure your belongings are packed and loaded properly for a long distance move

Safety Assurance Of Electrical Installations

Electrical Installations

More about Electrical Installations

Electricians are needed wherever there is electricity. They can expect to work in homes, offices, factories, and even farms, carrying out maintenance and repairs, and sometimes designing and installing new systems.

Given the risks associated with electricity, offering a safe and reliable service to customers is paramount. Electricians need to have an intimate knowledge of the latest safety standards and work to a strict code of safety conduct.

Occupational Standard

The WorldSkills Occupational Standard specifies the knowledge, understanding and specific skills that underpin international best practice in technical and vocational performance. It should reflect a shared global understanding of what the associated work role(s) or occupation(s) represent for industry and business.

Definition of Electrical installations

Electrical installations means the construction or installation of electrical wiring and the permanent attachment or installation of electrical products in or on any structure that is not itself an electrical product. “Electrical installation” also means the maintenance or repair of installed electrical wiring and permanently attached electrical products. “Electrical installation” does not include an oil module.

Examples of Electrical installations in a sentence

Electrical installations and repairs involving communication and signal systems of railroad companies.

Electrical installations and repairs involving remote and permanent broadcast systems of radio and television stations li- censed by the Federal Communications Com- mission if the systems are not part of the building’s permanent wiring.

Electrical installations inspection and maintenance

How To Wire Switches In Series?

How to Connect Two Switches in Series to Control a Single Load?

In today basic home electrical wiring installation tutorial, we will learn how to wire and connect two switches in series to control and operate a single light point.

Mostly, this is not a proffered method to wire single way switches in series as parallel or series-parallel connection is used in common electrical wiring installation. In some case, it may seems useless connection, but there are some possibilities where we have to control single load from two places while both switches must be switch ON to operate the load

Below is a simple step by step tutorial with schematic and wiring diagram which shows how to wire single way switches in series ?

Requirements:

Single Way Switches (SPST = Single Pole Single Through) x 2 No

Lamp (Light Bulb) x 1 No

Short pieces of cables x 4 No

Procedure:

Connect the two single way switches, light bulb in series to the power supply as shown in fig below. Keep in mind that both switches S1 and S2 must be closed to complete the circuit. If there are more switches connected in series with electrical appliance i.e. light point, all of them must be at ON position to operate the load. If one of the single switch is open, the circuit won’t work then.

The circuit will only complete if both of the switches are at ON position. In other words, If one of the switch are open or at OFF position, the light bulb will not glow. This is the same case for other loads as well which are connected in series to control by two single way switches.

In simple words, there are four switching positions and if both the switches are at ON position, the light bulb will glow. On the other hand, if one of the switch is at OFF position, the current will not flow in the circuit as the circuit behaves like an open circuit, hence bulb will not glow. No matter all of other connected switches are at OFF or ON positions.

Electrical Installation

Electrical Installation is easy to handle and is fully integrated with other disciplines such as electrical engineering or cabinet engineering. You can design power distributions in buildings and define the location of operating material in machines, plants and buildings. Existing floor plans in PDF or DWG format are imported to scale

All field devices from the plant layout and control diagrams (from Building Automation design) are placed in the floor plans and linked to the existing symbol data of the diagrams. Cable labels are taken over, cable and material lists are generated, and the software automatically calculates all required material quantities. This makes your project work much easier and eliminates time-consuming calculations for quotations.

Electrical Installation is ideal for engineers, electrical installers, craftsmen companies, facility managers, electrical system contractors and cabinet builders, as well as maintenance and service personnel specialised in electrical and building technology.

Deal with shortage of skilled personnel and an ageing workforce

Securely save employee knowledge in project templates including the right parts data. Once an employee leaves their know-how is still available within the company.

Easy-to-Use: amongst other prices software has been awarded with the „Golden e“for its easy to use user interface.

Access over 1.4 million parts data and symbols from more than 280 manufacturers in wscaduniverse.com and save yourself the hassle of designing the parts.

Use one single software to handle different aspects of a building of plant: network plan, circuit diagram, hydraulic/pneumatics, piping and instrumentation diagram, cabinet engineering, etc.

Handle the cost pressure

Use your human brain power where it is irreplaceable and let software handle other tasks

Reduce manual work by automating engineering processes and store your know-how in standard project templates. Reusing these saves enourmous amonunts of time and substantially improves the quality of your output.

Gather data only once and then access it seamlessly across all engineering disciplines: from the data point of a sensor to the terminal in the cabinet. Make use of the integration to PLM and ERP systems to integrate all engineering data in one backbone. It reduces errors and rework.

Finish engineering projects faster

With you can create installation und distribution plans for 140 residential units in 1.5 days, including all documentation. Just ask us for real life examples.

Use product configurators to generate schematics

Define standards and increase reuse of standard modules to save enourmous amounts of time while achieving higher quality at the same time.

Rely on the integrated dictionary to create multi lingual schematics.

How To Wire Switches in Parallel?

How to Connect Two Switches in Parallel to Control a Single Load?

In previous basic home electrical wiring installation tutorial, we learned how to wire single way switches in series. Today, we will learn how to wire and connect two switches in parallel to control and operate a single light point.

Mostly, this is a preferred method to wire single way switches in parallel as parallel or series-parallel connections are used in common electrical wiring installation these days due to advantages over series connection

Below is a simple step by step tutorial with schematic and wiring diagram which shows how to wire single way switches in parallel?

Related Wiring Tutorials:

Godown Wiring Diagram – Tunnel Wiring Circuit and Working

Tunnel Wiring Circuit Diagram for Light Control using Switches

Requirements:

Single Way Switches (SPST = Single Pole Single Through) x 2 No

Lamp (Light Bulb) x 1 No

Short pieces of cables x 5 No

Procedure:

Connect the two single way switches, light bulb in parallel to the power supply as shown in fig below. Keep in mind that one of the switches S1 or S2 must be closed to complete the circuit.

Common Mistakes To Avoid When Hiring An Immigration Lawyer

How do I Pick a Good Immigration Lawyer? What should I Consider When Selecting an Immigration Lawyer?

The experiences include incompetence, neglect, apathy, bill padding and even fraud. Given the stakes that are involved when searching for immigration relief, a bad immigration lawyer can be tragic for an applicant. So how do you select a good immigration attorney? Here are a few basic tips that you can consider when deciding to hire an immigration lawyer. A good immigration lawyer or law firm can make the world of difference and it is a good idea to fully evaluate an immigration lawyer before you select him/her.

1. Check to see if the lawyer is actually a lawyer and if the lawyer is in good standing with their bar association.

Most Bar associations publicly disclose who is a member of their Bar and also when a lawyer has been sanctioned. As a general rule, if the lawyer had been disciplined by their Bar association, you may want to move to another lawyer. We have had clients where their previous lawyers had significant public reprimands and the clients were not aware. In some cases the lawyer had actually been disbarred but continued to represent him/herself as a lawyer. The so called “Notario” fraud is also rampant.

2. Check to see if the lawyer is a member of American Immigration Lawyers Association (AILA)

AILA is the national association of immigration lawyers that was established to promote justice, the philosophy of fair and reasonable immigration law and policy, advance the quality of immigration law, and enhance the professional development of the members. The group has over 12,000 members and provides regular continuing education training for immigration lawyers. Most immigration lawyers and firms are members of AILA and if the lawyer or law firm is not, this may give you an indication that the firm does not focus primarily on immigration law.

3. Google, Google, Google

You should perform simple google searches on the lawyer and the firm. Use key words including the firm or lawyer’s name combined with, “reviews”, “bad reviews,” “Complaints”, “Testimonials.” You can often find out a significant amount of information from simple Google searches that can help you. You should also consider the lack of an internet presence when deciding on a lawyer. If the lawyer or law firm does not appear on the internet, this may be a sign that they do not have many clients or that the firm is regionally focused.

4. Ask About Performance and the Immigration Cases the Firm has Worked On

Some lawyers are perfectly happy to take on a case that is not in their area of expertise and use the client as a paying Guinea pig. If you are applying for an E-2 visa for example, ask the lawyer how many E-2 cases that they have worked on and get that in writing. You can also ask how many they have had approved. Immigration is a vast field so be sure to hire a lawyer that has extensive experience in the area that you are looking for.

5. Consider More than Just Price

All we can say here is that you often get what you pay form. Many immigration law lawyers will post fees that are extremely low and we have taken over cases where the client received horrible service and negative outcomes. This is not always the case but something to consider.

Make Sure Your Immigration Attorney Has Experience with Your Type of Case

Immigration matters in the United States can range from applying for work or family-related visas and green cards to asylum to deportation. Our attorneys have experience with every type of immigration case, and we’ll be able to explain our past experiences with your type of immigration case.

Ask If You Will Work With an Actual Attorney

All immigration cases require an extensive level of attention to the details of your personal circumstances. Our attorneys recognize this fact and take pride in providing an open line of communication to our clients.  We are a national recognized immigration law firm, but we’ve kept our boutique firm mindset as we’ve grown over the years. You will work directly with an experienced immigration attorney. Most big firms will not be able to deliver that personal attention and you may be delegated to a paralegal.

Questions You Should Be Asking Your Immigration Attorney

The practice of immigration law is very complex and should be approached with great care and attention to detail. If you are seeking legal counsel for an immigration law issue, you want to take steps to ensure your case is being handled by someone who will do the best possible job for you. While selecting the right immigration attorney can seem challenging, here are some questions you should be asking to help guide you in the right direction.

Questions For Your Immigration Attorney

At an initial meeting with a potential immigration attorney, there are a few questions you should get answers to. For starters, you want to work with a law firm that focuses its practice on immigration law. This means that they prioritize immigration issues and are more likely to work to remain as up to date as possible on immigration issues.

You will want to ask whether the attorney has experience handling a case like yours. Experience is powerful. Immigration law covers a wide spectrum of issues, from deportation defense to green cards and visas. Ask the attorney about his or her experience with handling your particular type of case.

Ask the attorney whether he or she will be the person to oversee your case through to its resolution. Be clear as to who at the firm will be handling what aspects of your case. While support staff often plays a valuable role in legal cases, you should know who is working on your case and who to contact should you have any questions.

You may also find it beneficial to ask how the attorney can help you. While this may seem to be a broad question, the answer provided can be very valuable. It can provide you with insight into how the attorney communicates and explains things to clients. It lets you see first-hand how the attorney can think on his or her feet, a valuable skill should your case ever requiring any kind of hearing. The answer can also clarify what will be happening should the attorney take on your case. What tasks will be handled regarding your case? Will you be responsible for filing certain or all paperwork? Will you be represented at any hearings? These are all great questions to clarify things with and help set your expectations.

In line with the above questions to help manage your expectations, you should also ask your immigration attorney about the estimated timeline of your case. This will help you prepare for the journey ahead. Having a general sense of the timeline for your case can provide peace of mind as you travel what can seem to be a very long road.

You also want to be clear with your attorney about how they charge clients. Get the details about how the attorney bills and for how much. You will also want to know when fees are due for payment.

Qualities You Should Look For In An Immigration Lawyer

Immigration law can often become extremely complex, which makes it difficult for many people to fully understand the various issues that they will face when immigrating to the United Kingdom.

A god immigration solicitor will be able to help you work through the paperwork that needs to be completed in order to ensure your application is successful, but you need to be aware of what to look for when hiring. Here are a few of the qualities that a good immigration lawyer will possess.

An Eye For Detail

There is often a large amount of paperwork that goes along with any immigration application and mistakes can often set the process back and lead to more time being taken. As such, your immigration solicitor must have a superb eye for detail, allowing them to highlight any issues with the paperwork before it gets sent away. This will ensure the process runs as smoothly as possible.

Strong Communication Skills

Complex legal issues have the ability to confound members of the public at the best of times, but the issue is exacerbated for those who are looking to immigrate and may not understand the various pieces of language that are used in the paperwork they are required to complete. This means that the immigration solicitor that they work with needs to be a strong communicator who is able to explain what the client needs to know in terms that they can easily understand. This trait will also prove to be invaluable if the solicitor needs to correspond with other professionals in relation to your application.

A Thirst For Knowledge

The legal profession is constantly changing, with immigration law being particularly volatile in this respect. A good immigration solicitor will understand the importance of updating their knowledge base as often as possible, constantly research the latest developments in their area of law and making the effort to understand how this applies to their clients. Failure to do so could lead to them operating under outdated information, which will in turn cause more difficulties for their clients.

Empathy

Empathy is probably the most important quality you should look for in an immigration lawyer. Does he really care what happens to you? The sad reality is that some lawyers do, and some lawyers don’t. If you don’t consider yourself a good judge of people, bring along someone who is when you meet the lawyer for a consultation. Client reviews are also helpful in this regard.

Empathy is especially important when you are paying a flat fee for a defined service such as a visa application, because your lawyer will make the same amount of money regardless of whether you win or lose, and he can always blame immigration authorities if you are rejected. It is also particularly important if you are paying by the hour to avoid deportation — after all, your lawyer knows that if you are deported, he will probably never see you again anyway.

Creative Problem Solving

A good solicitor will understand that no two clients will ever present the same challenges, which means that they need to be able to adjust to each individual’s situation and use their problem solving skills in order to help them traverse any obstacles that might be in their way. This often requires a level of creativity, alongside the analytical skills that immigration solicitors must possess, so be wary of any solicitor who is unable to offer potential solutions when they are faced with a problem.

Perseverance

Even when all of the paperwork has been filled out correctly, it is often the case that the Visas and Immigration department will ask for further clarification on issues or otherwise slow the process down. A good immigration solicitor must demonstrate perseverance, allowing them to complete all of the work that is required by the client in order to achieve the desired outcome.

Mold Remediation Make The Best Choice

How to Safely Work with Lead-Based Paint

Next to asbestos, the idea of lead-based paint puts a chill in the heart of potential homebuyers, current home dwellers, and particularly do-it-yourselfers remodeling their own homes.​ Awareness of the dangers of lead-based paint began in the 1970s, after the Environmental Protection Agency (EPA) announcement that ingestion of lead-based paint may cause severe learning disabilities, behavioral problems, seizures, and even death. These warnings are red flags for anyone owning an old home pre-dating 1978 when lead-based paint was banned from being sold in the U.S.

But lead-based paint on a home does not mean that the lead-based paint cannot be encapsulated with new paint or that it cannot be scraped, sanded, and then painted. It simply means that a different set of precautions must be heeded when taking on this project in order to do it safely for both the worker and for the home’s occupants.

Lead-Based Paint: Legacy of Protection and Poisoning

Lead has long been used as a component in paint, and as one of the chief components of water pipes, as far back as the Roman Empire. Among its many uses, lead was also used as an additive to wine, because of its slightly sweet taste, as well as an element contained in many cooking utensils and vessels.

Knowing what we know now about the poisonous capability of lead, it should come as no surprise that the effects of lead poisoning have been far-reaching. Some historians even suggest that the fall of the Roman Empire can be partially attributed to the presence of lead poisoning in so many of its leaders and citizens.

However distressing it may be to discover the presence of lead-based paint in a home, there are ways to live and work with it. The most important thing to remember is that as long as the paint remains solid, it will not harm you. Merely touching a painted surface or being in the immediate area of lead-based paint will not cause adverse effects.

People and Houses That Are Most Affected by Lead-Based Paint

Everyone, but mostly children, can be harmed by lead-based paint. Lead-based paint appears to mainly affect children age six and under, although adults may experience problems with pregnancy as well as neurological conditions, which range from the cumulative and chronic effects of exposure to lead, including acute conditions such as renal failure and encephalopathy. Thankfully, elevated blood-lead levels have dropped dramatically since 1978, due mainly to aggressive education efforts from the EPA, state, and local agencies

The Process of Installing Replacement Windows

Installing new replacement windows is a process that most homeowners go through only once or twice in their lifetimes, so it is normal not to have the slightest clue of what happens. Here is a highly generalized account of what you might expect when a full-service company replaces your windows.

Should You Stay Home?

If you can take off time from work or can work from home, do so. Whole-house window installation is highly invasive, affecting every room of your house. The window company will assure you that you do not need to stay home, but this is always a good idea to keep work in line and to keep an eye on valuables.

How Closely Should You Monitor the Workers?

The best advice for managing a work crew in your home is to be within calling distance if they have questions, but do not hover. You get the best results if the foreman can call on you as a resource (which, in practice, will not happen much) while giving the crew space to do their best work.

Before Installers Arrive

Touch bases with the salesperson or scheduler and confirm installation date and time.

Have unique needs? Place Post-it notes on the wall next to the windows to be replaced, specifying special instructions. For example: “Please save old window.”

Remove Old Windows and Begin Replacement on Day 1

Meet the job foreman and walk through the house, going over each window. This is your chance to catch any errors the window company may have made in ordering your windows.

If this is a multi-person crew, one set of installers will bring in windows as another set of installers removes windows.

Walk through the house on your own to ensure that installers have put down drop cloths inside.

Optional: Add drop cloths outside if you have flower beds that you wish to preserve. Inside, dust barriers might be set up, but this is not really necessary, as window installation does not create much dust.

As removal continues, installation proceeds. Ropes for the window sash weights are cut. Weights drop to the bottom of the window pocket. New windows are set in place and leveled with shims. With the window level, it is nailed into place.

Installers periodically move old windows outside; the stack of old windows grows.

The installers are now in a groove of removing and replacing. There is little need for supervision, but it is always a good idea to touch base with the foreman.

Depending on the size of the installation crew, by the end of the day, you might expect up to 10 windows to be done. You do not want any windows to be boarded over. Insist that each window space is replaced with a new window or left in place with the old window.

No tools should be left in your house. Rooms are broom-clean. Old windows outside are removed.

Types of Mold and How to Remove Them

There’s a fungus among us and it is mold. Mold spores are everywhere and when they find moisture and moderate temperatures (60 to 80 degrees Fahrenheit), they thrive and grow. While some fungi are beneficial, many can be dangerous to the health of humans and destructive to property.

The more common molds that most homeowners encounter can be classified into three categories: allergenic, pathogenic, and toxic.

Allergenic molds affect the 20 to 30 percent of the population who are susceptible to mold allergens. While extreme infestations can require removal by a professional, most allergenic molds can be removed with home disinfecting products.

Pathogenic molds cause disease and infection especially in young children and adults with compromised immune systems. Small infestations can be controlled with disinfectants but large colonies require professional removal.

Toxic molds produce poisonous chemicals called mycotoxins that intentionally harm any living organism including humans and animals. These are quite deadly and require a professional to kill the mold and dispose of any affected materials.

Once mold is discovered, you should hire a professional or use our guide to help identify the 12 most common types of fungi and develop a plan for removal. Once the mold is removed, it is essential to identify the moisture problem that led to the growth.

DIY Mold Cleaning Methods

If allergenic molds are caught early, you can easily remove them with household disinfectants. When using any of these products, make sure there is adequate ventilation in the area and wear protective gear like gloves, eye protection, and old clothes that can be washed in hot water to kill stray spores.

Chlorine bleach: Sodium hypochlorite or regular household bleach works best to destroy mold and remove any discoloration. It is quite harsh and should be diluted before using.

Hydrogen peroxide: Less harsh than chlorine bleach, hydrogen peroxide (three to 10 percent solution) will kill mold and lighten stains. While it does have a bleaching effect, it works more slowly than chlorine bleach but has no toxic fumes or residue.

Distilled white vinegar: Vinegar is acidic and slowly breaks down the structure of mold and kills it. Vinegar is non-toxic but mold stains may remain and additional scrubbing with a household cleaner may be needed.

Baking soda and borax: Sodium bicarbonate (baking soda) and borax each have a high pH that inhibits the growth and survival of mold. Both products are inexpensive, non-toxic, and easy to mix with water. Borax is more effective than baking soda but not as effect as a stronger cleaning product.

How to Use a Vapor Barrier to Control Moisture in a Crawl Space

Combatting moisture is a part of life for most homeowners. While nearly everyone is familiar with moisture problems due to faulty or damaged roofs and walls, or from rainwater runoff that seeps into foundations or up through concrete foundation floors, homes built over crawl spaces deal with moisture from another source: water vapor that rises naturally from the exposed soil and becomes trapped in the enclosed crawl space.

Problems Caused by Moisture

Moisture is one of the main foes of a home’s structure—potentially causing both structural problems and health issues. Uncontrolled moisture can cause rot and decay in wood framing and other materials, and it fosters mold and mildew that can cause allergies and asthma. The amount of moisture that is present determines if you can finish a basement, for example. Moisture also determines what type of below-grade flooring you are able to install. At its most extreme, moisture can even determine if the construction of a home or room addition is possible at all. Where moisture is a known problem, vapor barriers are integrated into wall, ceiling, and floor construction to combat the effects.

Mold and Mildew

One of the most serious problems caused by moisture is mold, mildew, and other fungi. According to the CDC, mold can cause nasal stuffiness, throat irritation, coughing or wheezing, eye irritation, and skin irritation to people with sensitivities. And people with mold allergies can have much more severe reactions, including lung infections. Eliminating mold is difficult, and fully remediating mold-related problems is expensive. Mold’s effects go well beyond just harming people. As a direct byproduct of crawl space moisture, mold can blacken floor cavity insulation and structural elements. Because there is often no light and only minimal ventilation in a crawl space, the problem never improves unless preventive or remediation methods are enacted.

Rot

Structural elements of your house, such as joists, sills, posts, and beams, are made of wood. Being an organic material, wood will begin to rot when it comes into contact with water for prolonged periods.

Rodents and Other Vermin

Animals of many types are drawn to water and can infest your home. These pests include carpenter ants, termites, rats, mice, snakes—even skunks and armadillos.

The Best Cleaners for Your Outdoor Deck

Some experts recommend that homeowners should clean their decks at least twice a year—preferably in the spring and fall. The safest, most environmental way to clean a deck is to not clean it at all, eliminating the chance of toxic chemicals being introduced into the environment and water. Sure, you could raze the deck completely, getting rid of all of that moldy, mildewed wood, recycling it and making it someone else’s problem, and then start all over again by building a new one. But that’s not always possible, nor is it the best or most feasible choice.

Baking Soda, Vinegar and Dish Soap

Everyone’s favorite natural cleaners can be used on the outdoor deck to tackle mildew and algae. Here’s the recipe:

Box of baking soda

1 cup of vinegar

2 Tablespoons (T) of mild dishwashing liquid/soap (not the stuff for your dishwasher)

1 gallon of water

Sprinkle baking soda on affected areas of deck. Mix vinegar, soap, and water in a bucket, apply to one section of mildew-infested decking, and scrub with a brush until you see results. This method may have to be repeated for a thorough job.

Borax

Like baking soda and vinegar, borate is an all-purpose natural cleaner that is versatile around the house and yard. Using a ratio of one cup of Borax to one gallon of water, address small areas of your deck at a time, scrubbing with a brush to remove algae and mildew.

Bleach

It’s not the most environmental choice, but chlorine does a good job of tackling standing water, mold and mildew (if you have a swimming pool, you get it). Read directions and labels, use gloves and masks, and only with proper ventilation.

Pressure or Power Washer

In case you’ve never noticed, some people just love their pressure washers. Crank it up and blast it with the pressure washer, and what a thrill it is to watch the paint peel off the facade of your house or the dirt melt from the fence between your house and the neighbor. It’s all that firefighter/action hero stuff re-enacted in your own yard.

Payroll Service Processing Systems

How to Do Payroll by Hand

Your employees must get paid for the work they do. Simple as that. Handling payroll differs from company to company, but there are many well-recognized calculation methods. For some small businesses, doing manual calculations is the only option.

Manually calculating an employee’s paycheck is based on whether he or she is salaried or hourly. To determine an hourly employees’ pay by hand, you must examine their time-sheets or punches for a week, or two weeks. To calculate a salaried employees’ pay, you can use an annual salary calculation.

Weekly Calculation

Let’s say your full-time hourly employee, Glenn, makes $15 an hour. You pay him bi-weekly. To measure his pay, your calculation should look like this:

40 hours x 2 = 80 hours. 80 x $15/hour = $1,200. This is his gross pay.

Full-time hourly employees who work more than 40 hours a week must earn overtime. Overtime in the U.S. is equal to one and half times an employee’s regular rate of pay. If Glenn works 50 (or ten extra hours both weeks) hours each week, instead of 40, this is what your calculation should look like:

Pay his regular rate from above, then determine overtime. 10 x 2 = 20 hours. 20 x $22.5/hour (15 x 1.5) = $450. This is also gross pay, albeit overtime

Annual Calculation

Your full-time salaried employee Linda makes $56,000 annually. You pay her semi-monthly (24 pay periods in a year). Determining her pay is a simple calculation, based on your company’s pay schedule. It should look like this:

$56,000 / 24 = $2,333.33. This is her gross pay.

Net Pay

The above scenarios only measure an employee’s gross pay. Once you withhold the proper federal, state, and local taxes, you’ll end up with employees’ net pay. For 2019, an employee’s withholding taxes are:

-A 6.2% Social Security tax on the first $128,700 of wages

-A 1.45% Medicare tax on the first $200,000 of wages

-A 2.35% Medicare tax above $200,000+

How to calculate payroll

The calculation of payroll involves the determination of gross pay, followed by the subtraction of deductions and payroll taxes to arrive at net pay. The calculation of payroll is a highly regimented process. This calculation should be followed meticulously, to ensure that there are no mistakes in the amount of net pay issued to employees, or taxes paid to the government. The calculation steps for payroll are as follows:

  • Notify employees. Tell employees to complete their timesheets by the close of business on the last day of the payroll period. Otherwise, pursuing employees to complete their timesheets will delay the payroll.
  • Collect timesheets. Obtain timesheets from all employees. This information may be located in an on-line timekeeping system.
  • Review and approve timesheets. Review all timesheets for completeness, and then forward them to the relevant supervisors for approval. Overtime in particular should be approved, since it is 50% more expensive than regular pay.
  • Enter hours worked. Enter this information if the hours worked information is collected manually. Otherwise, it may already be in the system.
  • Enter wage rate changes. Enter all authorized changes into the payroll system for wage rate alterations, withholdings, and deductions. In particular, ensure that all deductions have been entered for adjustments to gross wages for tax purposes, since they impact the amount of payroll taxes paid.
  • Calculate gross pay. Multiply wage rates by the number of hours worked to arrive at gross pay.
  • Calculate net pay. Deduct all authorized withholdings and pay deductions from gross pay to arrive at net pay.
  • Review. Print a preliminary payroll register and examine the gross pay, deductions, and net pay for each employee, to ensure that it is correct. If it is not correct, revise the prior entries and run another preliminary payroll register.
  • Pay employees. Cut paychecks and remittance advices. Also print a final payroll register and archive it. Have an authorized person sign the checks. Alternatively, issue electronic payments to employees.
  • Remit taxes. Forward all applicable payroll taxes to the government by the mandated due date.
  • Distribute pay. If checks were cut, retain them in the company safe and distribute them on pay day. An extra control is to require a proof of identification before handing a check to an employee.

Paperless Payroll

As you can see manual payroll calculations are quite labor-intensive. To reduce time and risk for error, you can simplify the process by switching to a paperless payroll. The benefits of going paperless include:

Electronic quarterly payroll tax returns.Quick access to real-time payroll data for proper payroll processing.Employees have self-service option to manage payment preferences and view pay statements.Customizable security levels to protect data.Custom reporting capabilities.Complete integration with benefits administration and other voluntary deductions.

The math involved in manual payroll calculations is extremely time-intensive. It requires constant attention and also increases the risk for errors and late payments to government agencies. Adopting a paperless payroll process will make payroll easier, freeing up time and providing self-service options for employees when they need information.

Calculate Tax Withholding

Step 1

Calculate each employee’s tax withholding individually. Review the employee’s W-4 form to identify the number of allowances claimed. Identify the current deduction amount per allowance as defined by the Internal Revenue Service each year. Multiply the number of allowances by the exemption amount. For example, in 2012, the exemption amount equals $73.08 per allowance for weekly payroll processing. If the employee claims 2, deduct $146.16 from the employee’s gross pay.

Step 2

Refer to the current IRS withholding chart for the current tax year to determine the employee’s withholding amount. Find the appropriate payroll cycle and marital status on the chart, and identify the withholding amount based on the employee’s taxable income. The pay frequency may be weekly, bi-weekly, semi-monthly or monthly. As an example, an employee with $310 in taxable earnings for a week in 2012 would have 10 percent tax withheld on all earnings exceeding $156, or $15.40.

Step 3

Calculate the Social Security and Medicare withholding for the pay period. Check the current tax rates according to the Internal Revenue Service tax publication for the year. In 2012, the Social Security withholding equals 4.2 percent of all earnings up to $110,000. The Medicare percentage for 2012 is 1.45 percent of all earnings. Reduce the employee’s net pay by the tax withholding calculations.

Step 4

Calculate and deduct any other employee contributions such as health insurance premiums, 401(k) contributions or other deductions

Benefits of running payroll manually

There are some benefits to running payroll manually, especially for small businesses with only a few employees.

1. No payroll software expenses

Payroll software can cost your business anywhere between $10 and hundreds monthly, depending on the software, the number of employees, and the features you choose.

You can run a high bill with payroll software. Sometimes there’s just no room in the business budget for another expense.

There are free payroll software options, such as Payroll4Free, but its paycheck calculation features can be found elsewhere.

2. You’ll understand payroll inside and out

You’ll hone your payroll processing skills by doing payroll manually.

Your intimate understanding of how to do payroll will continue to serve you even when you’re not handwriting the checks. Business owners who use payroll software should regularly check their employees’ earning reports to spot errors.

3. It’s manual payroll, not solo payroll

Calculating payroll taxes deters most business owners from doing their own payroll.

If you choose to do payroll by hand, you can still access trusted sources online to help with difficult payroll tax calculations.

Commercial Carpet Cleaning

PRODUCT CARECARPETS PRODUCT CARE

Caring for your carpet doesn’t have to be overly expensive, extrenuous or time consuming.

There are four basic requirements for caring for and cleaning your carpet that will help it stay looking great, keep it sanitary and ultimately prolong your carpet’s life:

Vacuuming your carpet frequently and thoroughly

Cleaning up all spills promptly

Periodically employing professional steam cleaning services

Taking simple preventative maintenance steps

INITIAL CARE

In the weeks after your new carpet has been laid you may notice that it is shedding some fuzz/lint. Don’t worry, this is normal for some carpet types and isn’t a sign of carpet damage. Simple light vacuuming will remove this surface lin

VACUUMING

Purchasing a good quality vacuum is an investment in the appearance, cleanliness and life span of your carpet.We recommend the frequent use of an upright vacuum cleaner that has a correctly adjusted and clean beater bar and a revolving brush. Adjusting the beater bar height regularly also helps prevent damaging the carpet with excessive beating. Vacuums with micro filters are preferable as they eliminate fine particles (a common cause of allergy and asthma-related problems)

Many people don’t realise that the suction performance of a vacuum is significantly reduced once the dust bag is half full. We recommend changing or emptying bags at the half way mark and replacing filters as per the vacuum manufacturer’s instructions.Giving your carpet a light vacuum (three passes over an area) twice a week, and a thorough vacuum (five to seven passes over an area) once a week will keep your carpet clean and ultimately improve its life span

Vacuum against the direction of the pile first to lift the surface and remove dirt and grit as well as reduce matting. Finish by vacuuming in the natural direction of the pile to achieve a smooth, even finish.Regular vacuuming removes soil and grit on the carpet’s surface before it is worked down underneath the pile and is harder to clean

A Carpet Cleaning Guide for Consumers

We do understand that hiring the right carpet cleaner is not an easy task for you, so we created this carpet cleaning guide. The difficulty occurs due to so many confusing claims, misleading advertisement and poor information that always keep you in dilemma while choosing a carpet cleaner. In addition to this, you also need to deal with those service providers that do intensive marketing, offer super low prices, but give very poor services with their unqualified technicians. Because of these problems you always wonder how you can find a competent, qualified and professional carpet cleaner for your requirements.

In order to avoid the mistake and to get the best cleaning services for carpet cleaning, you should read this consumer guide as your first step in this process. This highly informative section will inform you about those four things that you should remember to keep the carpets safe from rip-offs, it will also inform you about those eight mistakes that you should avoid while selecting a carpet cleaner for you. In addition to this, this guide will also share a four step method by which you can keep your carpet clean, fresh and healthy.

We created this guide so you can understand the carpet cleaning process in a much better way and with the help of this information; you will be able to choose a good carpet cleaner in an intelligent manner after evaluating each and every important aspect.

We are dedicated to help home-owners in the best possible manner so they can get the maximum return from the investment that they did in upholstery or carpet installation. In addition to this, we also welcome all of your questions and would love to answer all of your questions over the phone as well.

Carpet Cleaning Apps

Easy-to-use guide for removing common spots and spills from all types of carpet and rugs. This unique guide for carpet owners, carpet retailers, housekeepers and facilities managers provides clear and expert advice from an independent and trusted source.

Features:

Step by step solutions to common carpet stain problems.

Select from dozens of stains.

Swipe side to side to follow the simple advice steps.

Complete listing of all cleaning products certified as safe for use on synthetic and wool fibre carpets and rugs.

‘Buy Now’ button for safe and effective cleaning products.

Map of WoolSafe Approved professional carpet cleaner locations nearest to App user.

Contact details with one-touch call, email or web visit to Approved Service Providers you can trust.

STAIN CARE

Correct and regular maintenance will increase the life span of a carpet and also help maintain its good appearance. Cleaning should be proportional to the amount of soiling the carpet is subject to – the more dirt is deposited on the carpet, the more intensive is the maintenance program required.

Spot Cleaning

For spot cleaning, immediately remove as much of the spill as possible. To remove stains it is generally best to use general carpet cleaning liquids designed specifically for spot cleaning. The recurrence of stains after spot cleaning is not uncommon for a concentrated spill, so repeat is necessary.

Never rub or scrub the carpet as it may cause fuzzing or change the appearance of the carpet.

Always work from the outside of the stain towards the middle to avoid further spreading.

It is recommended to pre-test any cleaning agents on a small obscured area of your carpet to ensure they do not affect the appearance or colour of the carpet.

It is most important to rinse the cleaned area thoroughly with water and blot dry after removing any spills. If the cleaned area is not sufficiently rinsed, a sticky detergent residue remains which attracts soiling.

If stains fail to respond to treatments, contact a professional carpet cleaner immediately.

Spills should be attended to as they occur – the older the stain, the more difficult it is often to remove.

Dry Stains – Gently remove as much of the substance as possible using a small soft hand brush or spatula to break up any crusted material and then vacuum thoroughly.

Wet Stains – Blot with absorbent white cloth or paper towel, or use spatula to remove excess, then blot. For larger spills, a portable extraction unit or wet/dry vacuum, or professional cleaning is best.

Recommended Cleaning Methods

Rinse the cleaned area thoroughly with clear cold water after each cleaning step and blot dry.

1             Cold water

2             Detergent solution: One teaspoon of wool detergent (for example, Softly) and one litre of warm water

3             Clear household disinfectant

4             Dry cleaning solvent such as White Spirit or Murlex (available from hardware stores). Use only on dry carpet.

5             Chill with ice cubes in a plastic bag. Pick or scrape off substance.

6             Vinegar solution: Mix 1/3 cup of white vinegar with 2/3 cup of water

7             Warm water

8             Nail polish remover (should not contain lanolin)

9             Surgical alcohol

10           Vacuum clean

11           Mineral turpentine or Methylated spirit

12           Consult a professional carpet cleaner

Recommended Cleaning Methods

Rinse the cleaned area thoroughly with clear cold water after each cleaning step and blot dry.

Detergent – Use commercially available general carpet cleaning or spot removal detergent. Apply detergent sparingly to the stained area then blot to remove residue and rinse thoroughly with clear water. Blot dry.

Ammonia solution – Mix 1 tablespoon non-bleaching household ammonia with one cup of warm water. (Note: Do not mix with chlorine bleach.) Gently apply ammonia solution sparingly. Blot the stained area to remove the substance. Rinse thoroughly with clear water. Blot dry.

Vinegar solution – Mix one part white vinegar and one part water. Apply the white vinegar solution to the entire area that has been cleaned. Rinse thoroughly with clear water. Blot dry.

Alcohol – Clear alcohol, use as is. Apply only enough alcohol to dampen the stain. Blot dry. Repeat as long as the stain continues to transfer.

Clear water – Rinse the cleaned area thoroughly with clear water and blot dry.

How To Care For Your Nylon Carpet

Day-to-Day Care

There are three key things to do to maintain your new nylon carpet.

Vacuum frequently.

Clean spills promptly

Have carpet professionally cleaned at least every 24 months.

Note: Some fiber producers soil, stain, and wear warranties may be voided without proof of professional cleaning within requested time-frames. Consult your dealer for specific details

Vacuuming thoroughly and frequently is the most important thing you can do to keep your carpet looking great, particularly in high-traffic areas. Vacuuming helps remove dirt particles which dull the carpets appearance. Also, use walk-off mats at entrances to minimize the tracking of dirt particles onto the carpet and to reduce soil accumulation.

Vacuuming

The most important maintenance step is proper vacuuming. Regular and thorough vacuuming at least once a week and more often in heavy traffic areas will remove soil and dirt particles before they become imbedded into the pile of the carpet. An upright Vacuum cleaner with rotating beater bar and brush or canister type with a power head are the most efficient cleaners. The head of the vacuum cleaner should be adjusted so that the brushes barely touch the surface of the carpet. The easiest way to do this is to place a sheet of paper under the vacuum and adjust it until you hear the beater bar hitting the paper.

DO NOT use a self-adjusting vacuum since they adjust too deeply into the pile and will cause excessive fuzzing.

DO NOT use an overly stiff brush on the beater bar since this too will cause excessive fuzzing.

DO NOT use any vacuum made by Oreck or Dyson as these will cause excessive fuzzing

Basic Cleaning Steps: How to clean your carpet after a spill:

Immediately scoop up as much of the spill as possible. Then blot—do not rub—area with clean white cloths to remove excess moisture. Use a wet/dry vac if spill is large.

Apply warm—not hot—water and blot with clean white colths. Repeat until no stain is evident on cloth. If stain remains on carpet, make a solution of ¼ (1/4) teaspoon liquid dishwashing detergent to 1 cup warm water. Using a clean white cloth, apply the solution to the stained area and let soak about 5 minutes. Rinse with clear warm water and blot to remove excess moisture. Repeat until all detergent is removed to avoid resoiling.

Absorb any remaining moisture with layers of white paper towels weighted with a non-staining glass or ceramic object. When carpet is dry, vacuum or brush the pile to restore texture.

Online Dermatologist Concerns Addressed

Questions You Should Be Asking Your Dermatologist

An appointment with your dermatologist needn’t solely focus on your reason for going in, so make the most of your visit to the doctor by asking a range of important questions. This can include getting clarification on why your skin has recently changed, what could be causing your breakouts, or learning more about latest skin care technologies. No matter the case, asking these 11 questions are absolutely worth bringing up while you are in front of a specialist. Take this advice and we guarantee you’ll leave the doctor’s office with some valuable (and perhaps even life-changing) information.

How can I monitor my moles?

Early detection is the key to effective treating melanoma skin cancer. But instead of relying on your dermatologist to check for any abnormalities, ask your doctor to teach you how to monitor your body at home, then do so on a regular basis. Your dermatologist will be able to tell you which warning signs to look out for during a self exam — this knowledge could truly save your life.

Is my diet damaging my skin?

The food you put into your body is just as important as the products you use on your skin. To have a glowing, vibrant complexion, that means your diet needs to align with the needs of your skin, and anything greasy or full of sugar will have the opposite effect. Mediterranean foods like fish, leafy greens, and olive oil, Health explains, are a great foundation for a healthy skin diet.

What are the best products for my skin type?

It’s difficult to understand your skin type without the help of a professional. For example, you might assume that you have oily skin because of your shiny T-zone, but your dermatologist may consider your skin a combination, or even dry. Get a doctor’s advice on what kind of skin you have, and use this as the first step to selecting the right products for you.

How often should I exfoliate?

Exfoliation is a crucial step in your skin care routine, but knowing how often to do it isn’t really clear. You don’t want to over-exfoliate, InStyle points out, as this can get rid of cells that aren’t ready to be shed. That being said, you also don’t want to under-exfoliate, as you’ll be left with blackheads, a layer of dead skin, and clogged pores.

To get a definitive answer, ask your dermatologist how many times per week they recommend you exfoliate. Asking them first means you can avoid any problems associated with exfoliating too often or not enough.

How can i better protect my skin?

We wish our patients asked more questions about skin cancer protection and the risks of sun damage. Preventative care with the use of sunblock is paramount for your overall health and appearance. “The number one cause of aging is sun damage. “It is important to remind our patients that sunscreen, while helpful and necessary, is not equivalent to actually blocking the sun. Even with sunscreen, spending significant time in the sun will still cause sun damage.” And the dangers of prolonged sun exposure go far beyond the cosmetic. In addition to the negative cosmetic effects of aging, significant sun exposure also significantly increases their risk of skin cancers.

Is it okay to go out in the sun with this prescription?

While sun exposure isn’t exactly celebrated in the dermatology world to begin with, some treatments may make your skin even more sensitive to sunlight. If you’re taking a topical or oral medication for skin, be sure to ask your doctor if sun exposure will throw a monkey wrench into the treatment.

Which foods should I be avoiding?

Whether you’ve got an allergy to gluten or you’re unknowingly consuming a hundred grams of sugar hiding in your power bars every day, ask your dermatologist which foods you should be staying away from. Certain ingredients (like gluten) can hide in foods, and changing your diet can dramatically change your skin.

Are there ingredients that will upset my skin?

Much like food, there are skin care ingredients that should be avoided at all costs, depending on your skin type. For those with acne, benzoyl peroxide works wonders, but the same ingredient can make dry skin even more dry. Talk to your doctor about what will work best for you.

Do I really have to wear sunscreen for a quick errand?

This is a question that I’ve never asked, because I didn’t want to know the answer. I assumed the answer would be yes, but it seems silly to glob on sunscreen so that I can walk from my car into the coffee shop. However, it truly is a question that needs to be considered.

It’s a good idea to apply sunscreen every morning before you apply your makeup. Sun damage is cumulative, so an hour here and an hour there adds up over the years. Take a bottle of sunscreen with you in your bag so you have it ready when it’s time to reapply later. Reapply every two hours or so and more often if you get sweaty or wet.

Is indoor tanning okay?

Now come on, we know what the dermatologist’s answer is going to be to this one, but so many bright young women still worship the tanning bed. If you’ve been indulging in a little extra UV action, talk to your dermatologist about the real dangers.

The UV rays from a tanning booth are harmful to your skin and increase your chance of developing melanoma and other forms of skin cancer. “They also cause premature signs of aging such as wrinkles and brown spots.”

In fact, people who try a tanning bed before turning 35 have a 75 percent increased risk of developing melanoma over the course of their lives! Tanning is responsible for more cases of skin cancer than smoking is for cases of lung cancer. Bottom line? It’s just not worth it.

What is this acne coming from?

Acne triggers are all around us, and if you find the root of the problem, you’ll be one step closer to a solution. Depending on whether your acne is caused by your diet, stress or hormonal changes, you can form an attack plan that will really work.

Do I need sunscreen on cloudy days?

It’s easy to remember sunscreen when you’re hanging at the pool and the sun is beating down on you. However, if you’re standing outside on a gloomy day watching your daughter play soccer, it just doesn’t seem as important. However, the weather truly doesn’t matter when it comes to wearing sunscreen.

You should wear sunscreen everyday, even on cloudy and cool days to help protect your skin from sun damage, premature signs of aging, and skin cancer. “You may not realize it, but even on cloudy days, up to 80% of the sun’s UV rays can shine through the clouds.”

How To Kill Wasps

How to get rid of wasps safely and stop them coming back

Have you found yourself hearing that unnerving buzz flitting around your ear? Seen the glimpse of a skinny yellow-and-black body? It can mean only one thing, it’s wasp season.

Your instant reaction might be to swat the irritant and get back to your BBQ in peace. But if you take any advice away from this piece, do not swat! Not only would it be unfair to these wasps who are actually a great source of gardening help – they’re pollinators and do a great job of controlling aphid. But also, when squashed they release a chemical alarm that signals to other wasps to attack. Not ideal.

So if you dream of enjoying your Pimms in the garden without been harassed by a swarm of wasps, try a few of these tips on how to get rid of wasps, and keep those little yellow-jackets at bay this summer.

Keep your food covered and bin clean

Wasps love nothing more than a good rummage around your bings. Make sure you empty and wash bins regularly, and keeping bins away from windows to avoid attracting wasps into your home.

Grow strong smelling plants

Smells that can be used to discourage wasps from certain areas include tomato stems, fresh mint, ground coffee and cloves,’ says

How to Wasp-Proof Your Backyard This Summer

Wasps, hornets, and yellow jackets can put a serious damper on your outdoor fun. And since populations peak in late summer, now’s the time of year when you either deal with them or risk ruining a perfectly good afternoon nursing a seriously nasty welt.

Wasp Prevention

Many flying predators are quite territorial and will not start a new nest within a couple of hundred feet of an existing nest. You can work this to your advantage by hanging a fake wasp’s nest in a visible location early in the season

Early Intervention

In late spring and early summer, keep an eye (and an ear) out for new nests being built anywhere you might not want one: under railings, awnings, play equipment, eaves, overhangs, and in any other sheltered nooks or crannies near family spaces.

Tiny new nests of just a few egg cells can be knocked off right away and stepped on if the queen (the only mobile resident at that time of year) is away foraging. Even slightly larger but still small nests — those with few dozen egg cells — can be knocked off and destroyed using a bit more caution: Pick the coolest part of the day (sunrise is good) and dress in gloves, a high-necked top with long sleeves, long pants tucked into socks, and a head net, if you have access to one, or a kerchief worn snug over your hair.

Sometimes, you can just leave the nest alone. Wasps, hornets, and yellow jackets aren’t totally horrible. The predators hunt grubs, aphids, and houseflies — other pests that annoy at outdoor dinners and in your garden. Most wasps and hornets are generally uninterested in you and not particularly aggressive unless disturbed, and all of them will die come a hard frost or two in the fall; only the queen overwinters to start a brand new nest in the spring. So if the nest is in an out-of-the-way spot, and you don’t have curious pets that might disturb it, leave it alone and let nature take its course.

How to Get Rid of Wasps in Bushes

Wasps often build their nests within the protective cover of bushes or shrubs. As a result, the area around the bush becomes off-limits, because wasps vigorously defend their nests if they think the nest is in danger. Anybody passing by the bush becomes a possible target of painful stings. Get rid of wasps in bushes with a product containing pyrethrin, a natural chemical extracted from pyrethrin daisies. Pyrethrin is fast-acting, less toxic than pesticides and won’t harm the plant.

Inspect the nest from a safe distance during the day. Be sure you know exactly where the nest entrance is, and don’t attempt to spray the wasps if you aren’t sure of the location. Spray the wasps at night or early in the morning when temperatures are cool and most foraging wasps are settled in the nest.

Mix a pyrethrin insect spray concentrate at a rate of 3 to 5 tablespoons of concentrate in 1 gallon of water. Place the mixture in a clean pesticide sprayer. You can also use a premixed, ready-to-use spray. Light the nest safely with a lamp placed on the ground to the back or side of the nest. Never hold a flashlight in your hand, because the light shining in the entrance will agitate the wasps and provoke an attack.

Wear gloves, hat, boots and a bee veil or protective goggles. In addition, wear thick clothing, including long sleeves, sturdy pants and heavy socks. Line the inside of the pants with brown paper bags, and tuck the pants into your socks or boots. Stand at least 12 to 15 feet away from the nest, with the wind at your back. Aim the pyrethrin spray directly at the entrance to the nest. Continue to spray until the nest is saturated.

Things You Will Need

Pyrethrin insect spray

Pesticide sprayer

Lamp

Protective clothing

Brown paper bags

How to Get Rid of Wasps: Learn Everything About Them

Every householder experienced hard times getting rid of wasps in the house or outside. It is unbelievable that these insects appear in your life every spring and summer season.

I’ve tried plenty of wasp control products, including natural and non-chemical sprays and wasp traps. I have tried plenty of methods on how to deal with wasps and discovered TOP insect killers that will help you get rid of wasps outside and inside your house.

Besides, I have examined questions about how to distinguish different types of wasps and how to prevent their return to old nests. Take a look at my detailed guide on wasps and make a deliberate choice of the best killers to destroy these buzzing insects.

Wasps Identification

Probably, you are aware of the appearance of a classic wasp – it is an insect with black and yellow stripes. The length of the body of a wasp can range from 0.6 to 4 inches. There are wasps with four webbed wings as well as there exist wingless wasps.

Wasps Lifecycle

The wasps live two lives, I’d even say. The paradox is that the life cycle of wasps is pretty similar to how bees live. The only difference is about the female wasp. It lives alone in the winter period, then she creates the whole family again.

Get Rid of Wasps in Home & Backyard Using These Steps

Identify the kind of wasp

Before getting rid of the bees, you should know the species you’re dealing with. Bees and wasps often look the same, but the damage or threat they bring varies according to their kind. The treatment for each sting also differs.

Here are the usual types of bees and wasps you’ll encounter:

Ground bee – Ground bees are not harmful and never aggressive. Only female ground bees sting, and they will only sting when feeling threatened. They do not form hives but are often found nesting underground. The entrance to their nests is usually patches of bare soil.

Honey bee – The Honey be is a small bee with a barrel shaped body and a fury appearance, they usually live in trees or hollow spaces and their nest have a unique honey comb look and is a white or yellow colour.

Masonary bee – Masonry bees have a similar appearance to honey bees and get their name from the fact that they use mud, clay and other building materials in the construction of their nests.

Bumble Bee – There are over 250 species of bumble bee (genus Bombus). They have round bodies and a fuzzy, hairy appearance, they usually have a white and buff colour on their tails and live in very small colonies. There life span is around 28 days.

Yellowjacket – Yellowjackets are not bees, they are wasps. They are sometimes mistaken for bees because of their looks and their sting. The attacks of yellowjackets can be deadly for people who are allergic to their stings. They can also bite their target first before they sting.

Hornet – Hornet is the largest of the eusocial wasps, and they look similar to the yellowjacket. Their stings are considered more dangerous than those of bees. They usually build their paper nests in the shape of a teardrop.

If you find the hive inside your home, never block their entry point. Blocking will only encourage the bees to find another exit or entry point around your home. Here’s what you should do:

Step 1: Make sure you are physically protected. Wear bulky protective clothing before getting near the hive.

Step 2: Spray the hive with pesticide after sunset. This will lessen the possibility of getting stung.

Step 3: Check by morning if there’s any activity happening inside the hive. Spray pesticide again at dusk time, if necessary.

Step 4: When no other activities are observed, and you’re sure the bees are dead, you can remove the nest by placing a strong bag over the nest and removing it from it purchase. Although most species of bees will only use a nest for one season.

Conclusion

There’s a fine line between protecting the environment and protecting your family and home. In case you find the hive inside your walls or deep underground, it is better to seek the help of professional pest control. They are more knowledgeable about how to deal with these complicated situations.

Avoidable Car Troubles And Practicing Preventative Auto Repair

Auto Repair for Beginners

Many drivers know the feeling of one moment sailing down the highway and the next moment hearing and awful, expensive-sounding noise coming from the vehicle. It could be the clunk-clunk of a flat tire, the grinding noise of brakes with worn out brake pads, or the knocking noise an engine with serious problems makes. Cars are significant financial investments. They are also, for many people, a necessity. Getting to work or getting kids to school is impossible for people in many areas of the United States without a car. Cars also represent freedom for some people. That freedom comes with responsibility and all vehicles require a basic degree of maintenance to continue operating.

The Importance of Car Maintenance

Proper car maintenance is vital for many reasons. Perhaps the most important reason is that keeping up to date with car maintenance will save drivers from more expensive repairs later. Sure, no one wants to pay $20-$100 every three months or so for an oil change. However, that’s preferable to paying $7,000 to replace the engine, which may be a likely outcome of not staying on top of oil changes. Staying up to date with car maintenance also makes it safer to drive. Proper maintenance can prevent issues (like old tires going flat) that lead to roadside emergencies. Keeping up with vehicle maintenance and maintaining repair records will often net you more money when you resell your vehicle. It’s also better for the planet. Excellent maintenance keeps the amount of pollution your car produces down. Regardless of the type of car, driving is more pleasurable in a vehicle that works well, with properly rotated and balanced tires, the correct oil level, windshield wiper blades that work correctly. Many people drive daily and with so much time spend on the road, it’s important to enjoy the drive when possible.

What to do When Problems Occur

Auto mechanics must quickly and accurately diagnose common vehicle problems.

Many problems today are found using computer diagnostic systems in the shop, however, some simple problems are quickly and easily diagnosed manually.

Fluids, for example, have their own distinct colors making a potential leak easier to track. Quickly dabbing leaked fluid with a white paper towel can help you to better see the color of the fluid.

  • Pink or green fluids are usually coolant.
  • Yellowish? Look for problems in the power steering line.
  • Transmission fluid is more reddish in color.

Color is also helpful in diagnosing potential exhaust system problems. White, blue or black smoke can point to head gasket or engine valve problems which should be investigated immediately.

Basic Maintenance

Some drivers choose to save money by performing some or all of their car’s maintenance themselves. An easy first task is learning how to add windshield wiper fluid. Another simple task is changing out a headlight or rear light. Some people then go on and learn how to change turn signal relays or change their own oil. Some basic tools will be needed to perform vehicle maintenance. A basic set would include screwdrivers, wrenches, pliers, and channel locks in various sizes. A better quality jack than the one that came with the car is a good purchase. Also, try and find the car repair manual for the vehicle being worked on. This is not the same as the owner’s manual. The repair manual is designed for service center employees and gives detail and insight into how a car works and how to make basic repairs.

How to Change Your Air Filter

To maximize gas mileage and minimize emissions, your air filter should be changed every six months or 15,000 miles. To optimize savings, change it yourself.

Instructions

  • Step 1: Park level, turn off engine Park your car on a level surface in the shade. Turn off the engine and let it cool down.
  • Step 2: Locate air filter Open the hood and locate the air filter. In most cars, it’s enclosed inside a round or rectangular plastic case at the top or front of the engine.
  • Step 3: Flip open clasps Flip open the metal clasps on either side of the case. If they’re stuck, use the flathead screwdriver to pry them open. In some older cars, you may need to unscrew the cover.
  • Step 4: Pull out old filter Pull the old filter out of the case.

TIP: Hold the old filter up to the light—if you can see light through it, it’s still in good shape and can be reinserted.

  • Step 5: Slide in clean filter Slide in the clean air filter.
  • Step 6: Close clasps Close the clasps on the case.
  • Step 7: Close hood Close the hood—and breath easy. Now your car can, too.