Identifying Various Cracks In Stucco
There is a saying out there that goes…. “There are two types of stucco houses, one that is cracked and ones that are going to”. Cracking is inevitable when it comes to stucco, just like any type of cement based product. Expansion, wind and stress all play vital roles in why cracking occurs. Other issues that cause cracking issues in plaster can be brought on by improper installation of lath, improper mixing procedures and a couple of other variables. There are certain patterns that will allow you to identify what actually caused the wall to crack.
Lets take a look at some of the different types of crack to get a better understanding of why they occur.
Hairline Cracks:
It is normal for plaster to crack from movement and stress, especially in a new home. The wood dries, the vibrations from the construction equipment and other factors play a significant role in this for a brand new home. Hairline cracks are typically around a 1/16 of an inch wide or smaller, if the crack is bigger than that, than chances are that some other element is the culprit. Below are some examples of some hairline cracks that have occurred.
Cracks Regarding Foam Trim:
I see a lot of cracks on the foam trim that is used on stucco houses quite often and most of the time it is where two pieces of trim meet. The cause is usually because fiberglass mesh tape was not used on the seam where the two pieces met.
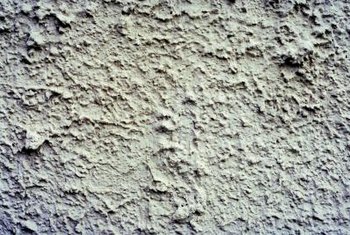
Spider Cracking:
This type of cracking is basically a sign that the base coat did not cure properly. This is caused by either drying too quickly, too muck water in the mix, or mixed incorrectly or applied when it was too cold or too hot the day the stucco was applied.
Patterns In The Wall:
When there are defining vertical and/or horizontal cracking occurring throughout the wall, then more than likely it is caused by the lath. Either the lath (the wire specifically) was not nailed or stapled off properly which is a more serious kind of cracking. Because the wire is essentially loose in some spots, then it will actually have a higher potential for forming even more cracks as time goes on. To correct the problem, the stucco has to be broken out and the lath has to be nailed off or replaced.
Diagonal Type Cracking:
Sometimes you will see a diagonal type pattern that will signify some other type of issue. Theses are usually in the general categories of seismic movements, house settling or shifting, etc. The ones that tend to develop around a door or window are the cause the framing in the door or window or due to vibrations in that particular area. Some are more serious than others, usually a good rule of thumb is the size and depth of the crack. If it is more than 1/8 of an inch wide, then it should be a bit higher on your priority list than smaller ones.
How to Clean Exterior White Stucco
Despite its use as a protective coating, stucco can actually be fairly delicate. The plaster is porous, so it can absorb dirty water as you try to clean it, and abrasive scrubbing or sandblasting can destroy the textured finish. Regular, gentle cleaning is key to keeping white stucco in good condition — the more often you clean the walls, the less intense any given cleaning needs to be. Therefore, you are less likely to damage the plaster.
- Fit a hose with a jet nozzle, which are available at hardware stores, and set it to a gentle water pressure. Wet the wall from bottom to top by spraying it with the hose. Stand as far from the wall as you can to keep the pressure low against the plaster.
- Mix TSP and water to make a paste according to the TSP manufacturer’s instructions. Apply the paste to a soft-bristle brush and lightly scrub any stained areas of stucco. Clean the brush thoroughly.
- Make a solution of 1 part bleach to 10 parts water. Apply the solution to the brush and lightly scrub any mold or mildew spots on the stucco.
- Wash the walls from top to bottom using the hose and jet nozzle. Rinse any areas you cleaned with chemicals particularly thoroughly.

How to Update Stucco
Updating stucco makes an old house look new again. Stucco, a mud-like substance used as a siding for homes, has been used for building since the time of the ancient Egyptians. Modern homes often have a stucco facade instead of solid stucco walls. Whether solid or facade, time and weather cause cracking and fading. Instead of replacing the stucco, use a few steps to update it.
- Pressure wash the stucco. Fill the tank with water only and set the psi to between 1,200 and 1,300. Use a wide sprayer tip and hold the wand 12 inches away from the stucco. Start at the top of the wall and work downward. Allow the stucco to dry for 24 hours.
- Fill small cracks with a caulking gun loaded with acrylic-based caulk. Squeeze the caulk into small cracks and allow it to dry. Smooth over the caulk with 120-grit sandpaper to make it even with the rest of the wall. Mix stucco patch according to the manufacturer’s directions, and spread a small amount over the top with a putty knife. Blend the edges with the surrounding areas.
- Repair larger cracks. Chip away the edges of larger cracks with a putty knife. Mix stucco patch according to the manufacturer’s directions and fill the crack using a putty knife. Blend the edges with the existing stucco surrounding the patched crack.
- Prime the stucco using an acrylic based sealant. Apply with a long-haired, or thick-nap, paint roller. Start at the top of the wall and apply the sealant systematically top-to-bottom. Allow it to dry for 24 hours.
- Cut in the paint using a soft-bristle brush. Go around the top and the bottom edges of the wall carefully with an acrylic-based, exterior paint.
- Spray the stucco wall with paint. Fill the spray gun with the acrylic-based paint. Hold the tip of the wand at least 8 inches away from the wall. Spray in a smooth, left-to-right motion starting from the top and working downward. Allow the paint to dry for 24 hours before adding an additional coat.

The Process of Smoothing Stucco
In most cases there’s no need to remove the old stucco to create a smoother surface. A stucco pro will simply apply a new texture over the existing one.
The pro’s first step will be to power-wash the home. After that, the pro will apply a new stucco base coat. He or she may use a premixed adhesive stucco that will stick to the existing stucco, or the pro may apply a bonding agent to the existing stucco before applying a skim coat of a mix of cement and sand. This base coat can vary in thickness from one-eighth of an inch to more than half an inch and is what will smooth out the undesirable texture. After the base coat, the professional will apply the finish, or color coat, which is typically about one-eighth of an inch thick.
When the indentations in the existing stucco are very shallow (less than one-eighth inch deep), a color or finish coat will be all that’s needed. As may be expected, adding just a color coat is typically less costly than adding both a base coat and a color coat. A good stucco and plastering professional will be able to tell you which solution would be appropriate for your home.
The Rolling Vs. Spraying Debate
The choice between rolling and spraying when painting stucco is largely a matter of personal choice. For bigger jobs, a sprayer will get it done more quickly. But you’ll still have to roll the ceiling to spread the paint into the smaller crevices that spraying can’t cover. For a single room or other small jobs, stick to a roller for simplicity.
The Paints and Coatings Resource Center cautions that spraying a stucco ceiling may be faster than rolling, but it also provides inconsistent results. Spraying also requires wearing a mask for protection and covering furniture and flooring to prevent damage. You will need special equipment, which you must clean immediately after painting to avoid clogs or damage. Finally, spraying often requires the user to water down the paint, which requires some level of painting know-how and experience.